Pages

Showing posts with label HDR. Show all posts

Sunday, April 24, 2016

"Step by Step: Electric Guitar Player XI" PicsArt App Plus

Electric Guitar Player XI

Another free to edit, a photograph here is the "Electric Guitar Player XI." I opened the picture in the PicsArt App in Windows 10 on my computer. I selected the Tools Enhance and upped the color a tad.

I used the filter in Artistic Effects called Polygon. This gave me some triangular shapes within the image. I adjusted them to show as many as I could without losing the piece's stability. I saved the large picture.

Next, I went to Lighting and grabbed a Bokeh layer, on this I used rotate tools to place the bulk of the lights on the bottom of the image. I used the property Screen to add the lighting. I went back to the Tools and chose the Curves to add depth to the colors, using the full RGB setting.

I added a border, selecting a blue and black balance for it. I then went to the Text tools and added my name and the year choosing black for the fill and outline. I saved this again.

I looked at the image in Picasa 3+ and decided to add some HDR appearance to the piece. I adjusted the Radius to a level setting and the Strength to a medium low one. I did this with Picasa's HDR Tool. Saving that I opened the image in Paint.Net to resize the piece for display.

72dpi, 1220 X 813, with 75 for compression, were the settings for the display picture. Be sure to click on the image for the larger view in your browser. Use F11 to see the Full Screen and F11 to return to the browser's regular setting.


Monday, April 11, 2016

"White Bicycle with Flowers in a Field" PicsArt App Plus

White Bicycle with Flowers in a Field

I have been garnering some photographs from various sources, and unfortunately, I did not keep track of the sources. This image was started on my Tablet in the PicsArt App. I applied a few different filters. First, I used the Artistic Watercolor filter increasing the color a bit. I also used the Fx filter HDR1 for that sharpness on the White Bicycle and Flowers. I added my name and year with the Text tools. I saved that large image, and it backed up to my Google Photos.

I downloaded the image to my computer. Opening in Paint.NET,  I adjusted the Saturation to 110. Then I used the Curves tool to add color depth to the piece. I saved this iteration.

Opening in Corel PhotoPaint, I resampled the image. 120dpi 1220 X 813 pixels, I saved as an Optimized JPG with 75 compression, and 25 smoothing.

I enjoy using the PicsArt App on my Tablet and combining the image creation with programs on my computer.

Sunday, January 3, 2016

"Street Musicians Three" Painter Essentials 5 Plus

Street Musicians Three


“Street Musicians Three,” is one more of my Music Themed images. I first used Picasa 3+ HDR tool on the photograph, Radius Medium and Strength Medium High. I saved the beginning iteration.

I opened that in Painter Essentials 5 and used the Watercolor Sketch set with a Dry Wash brush. This gave me a good watercolor image. I hand painted with the Soft Cloner Brush and added back in the faces, instruments, clothing and the guitar case and bicycle details. I smoothed out some of the Clouds and blue Sky, I added some detail to the trees, and the Red Building in the background.

Saving that iteration, I used Picasa, which was still open to add a Black Border to the piece. Saving that I opened in PhotoPaint and added my signature layer. I merged the layers and increased the Saturation by 21 then saved again. I had about an 8.3MB file at 120dpi.

For display here I Resampled the file to 1220 X 861, 75 Compression and 25 Smoothing, still at 120dpi, an Optimized JPG file, with a new name.

Wednesday, December 30, 2015

"Bonamassa - Just Got Paid" HDR - Painter Essentials 5 Plus

Bonamassa - Just Got Paid

"Bonamassa - Just Got Paid," a screen capture from his performance was used for this piece. I am currently listening to quite a bit of Joe's Music and really like it. Bonamassa Website

I was in Picasa 3+ and I used the HDR tool on the capture. The Radius was medium and the strength was medium high. I also applied the Border tool for a Black and White Border. I saved this image with a new name.

I opened in Painter Essentials 5 and Digitally Painted it with the Oil Painting set, Digital Watercolor Dry Brushes. I then switched to the Illustration set and used the Chalk, Pastels, Crayons Soft Charcoal Brushes. I saved this under a new name.

I then used Paint.NET to add my Signature layer and resized , placed it with the property Additive. I merged the layers. Saving again as a JPG. I used the original bordered size of the piece for display.

All song names and the artist name are owned by Joe Bonamassa and his company. See the link above for more information about this Great Blues/Rock Singer/Songwriter/Performer. Thanks!

Tuesday, December 22, 2015

"Street Musicians" Picasa - Painter Essentials 5 - PaintDotNET

Street Musicians


I gathered up a few new Guitar and Musician based themed free photographs. "Street Musicians," is the first piece I Digitally worked on. I opened in Picasa 3+ and applied the HDR effect, Radius was Medium, and the Strength or Value was Fair.

Saving that I opened in Painter Essentials 5. Here I used a Modern Painting set with Acrylics and Oils Real Wet Brush. After Digitally Painting that I used the Photo Painting Brush Soft Cloner to add detail to each of the Musicians and a tad to the background trees. Back in Picasa I applied a Black on Black Border and saved again.

Opening it with Paint.NET I applied Adjustments, Curves to add depth, and added my signature layer with the Property Lighten. I then merged the layers. I saved the large iteration at 120dpi.

I Resized /Resampled in Irfanview at 72dpi for display with another name.


Wednesday, November 4, 2015

"How To: Young Woman's Digital Watercolor Portrait" Corel

Young Woman's Digital Watercolor Portrait
I liked yesterday's Image quite a bit, so I found another Young Woman's Portrait on Unsplash Free Photos. I began adjustments in Picasa 3+. I first did Auto Contrast then I went to Brightness, there I increased the Highlights a bit, decreased the Shadows, and Increased the Color Temperature. I selected Saturation and increased the color some. Then I used the HDR tool, Low Radius, Medium Strength, zero Fade, and applied that. I saved the Large image.

Next I loaded the modified piece into Corel Painter Essentials 5. Selecting the Detailed Watercolor, I Set to Digital Watercolor Brushes, Diffuse Water Brush, Size 4.7; Opacity 100%; Grain 30% with Concrete Paper. I Digitally Painted the Young Woman's Portrait.

Still in PE5 I selected the Watercolor Sketch set with the same settings for Brush, Grain and Paper. I applied those settings to Digitally Paint over the Detailed Watercolor. Next I chose Photo Painting Brushes, Camel Oil Cloner Brush, Size 24.2, Opacity 72%, using this I retouched the Eyes, Ear, and Lips for some detail enhancement. I saved this iteration.

Using Corel PSP Pro X3 I opened that painted file and applied the Adjust, Smart Photo Fix. I set the Brighter to +28; Shadows to -30; Highlights to -10; and More Colorful to +20 with Sharper to +60. I added a Signature Layer, sizing and placing it I merged the Layers. As I wanted to mirror yesterday's image I went to Image, Picture Frame, and selected a Moss frame, outside image and merged that layer. I also used the Saturation Vibrancy set to 33 to punch up the colors one more time. I saved the Large iteration at 72dpi, RGB, 8 bit, JPG.

Per usual I resized the image for display here online.

It's time to ask again what format for my Workflow do you like better? The Outline Style or Narrative Style? One thing I haven't tried yet is combining the Styles using the Outline for the detailed settings and Narrative for explanations. I may try that if I get some feedback from You my Readers. Which do you prefer? Leave a Comment to reply.

Wednesday, August 5, 2015

How this was done - "You Cannot be Serious" Corel Painter 11

You Cannot be Serious


"You Cannot be Serious," is the image I created today. Using a portrait photograph from the Morguefile Free Photos I downloaded this afternoon, I Digitally Painted this piece.

My approach was fairly simple. I first opened it in Picasa (the update) and I heavily applied the HDRish tool to the portrait. I increased the Value and Radius, both. This highlighted the lines and pores of the face, as well as the shadows and highs.

I saved that iteration and opened in Corel Painter 11. There I used all Digital Watercolor Brushes, a Wash Brush and a Dry Bristle Brush to paint this very Serious Man's Portrait.  I Appended the Flesh Tone Palette and the Earth Tone Palette to the basic color starter one. I selected lighter values to begin with and built up the shadows and lines gradually with darker Flesh Tones.

I painted the small parts of his shirt a purple I had selected for some punch. I decided that I would mirror that color in the face around the shadowed areas. It tied the image in together nicely. I saved that iteration.

Next in Corel PSP Pro X3 I upped the Saturation Vibrancy by 33 and then added as another layer my signature with the property Lighten. I merged the layers. It was already a small display size download, so no adjustment was needed there.


Friday, May 1, 2015

"Near Clare, Michigan" Tablet

I am up North house sitting, so this is a brief post. I used my tablet for this image of the shed. I applied HDR to it, and upped the saturation.  Framed it all with tools available on the app.

The image is a simple one. I am relaxing and the Sun is out,  with a beautiful blue sky. Enjoy your day.

Monday, September 23, 2013

"Red Chair HDR Lomo" Picasa 3.9 - Corel

Red Chair


Scanning through my external archives I ran across this photograph of a Red Chair taken in a retail store. I opened it in Picasa 3.9 and close cropped it of extraneous information that added little to the composition. I liked the experimental angle the photograph was taken at.

I next applied Picasa's HDR feature, adjusting the strength and radius. I then added the Lomo feature for more depth and shadow play.

I took the image into Corel PSP Pro X3 to add Image Information and my signature. I did that and saved the large file. I then resized for display here.

Off the beaten path for my posts and images. But I am still enamored of the grain of wood, and this image does have that.

Saturday, August 31, 2013

"Leftovers from the 2013 Dream Cruise" Collage - Picasa - Corel

Vintage Tidbits Collage


I had some more photographs left over from the 2013 Woodward Ave Dream Cruise, I opened Picasa 3.9 and selected four, two with headlights, two back ends, of some of the cars I had photographed.

I picked build Collage in Picasa, made some appropriate selections for the Digital Collage and had Picasa make it. Being that the overall collage was a large piece I opened Corel PhotoPaint and resampled to a workable size.

Once in PhotoPaint I applied the Adjust, Local Equalization tool for texture and an HDR look. Getting back color depth and punch I used the Tone Curve Luminosity curve and pulled it down in the center of the graph. Then I selected Effects, Filter Forge's Photo Effects, Vibrancy for additional punch to the colors.

I saved that iteration and opened with Corel PSP Pro X3. Here I applied the Sharpen High Pass Sharpen Overlay. Back in PhotoPaint I added my signature in white, and saved again with some compression for display.


Friday, August 23, 2013

"2013 Woodward Ave Dream Cruise IV" Picasa HDR - Corel PSP Pro X3

Vintage Convertible with Leather Boot


For today's images I return to my selection of Custom Car photographs from the Dream Cruise. Using Picasa 3.9 I selected a Convertible Hot Rod with a Leather Fender Boot on the front.

I Cropped the image to focus on the Convertible. Then I used Picasa's HDR tool lowering the Radius and Strength. I then used the Punch tool and adjusted the colors for the punch. I saved that iteration and opened with Corel PSP Pro X3. Here I increased Saturation only a bit and applied the Sharpen High Pass Sharpen tool. I added my signature using the Visible Watermark and saved again. Then I resized for the blog posting.

Short on time today I only did one image, and I have only a few more to select from, I hope you are enjoying these posts about the Dream Cruise and the Custom Cars. Click on the image for a larger view.


Wednesday, August 21, 2013

"2013 Detroit Metro Woodward Ave Dream Cruise II" Paint.NET - Corel PSP Pro X3 - PhotoPaint

1957 Chevy Bel Air

Vintage Chevy Pickup Truck

Vintage Custom Carmel and Brown


I opened Picasa 3.9 browsing to my Dream Cruise Car folder. I selected my next Photograph, a 1957 Chevy Bel Air. Cropping it I focused upon the Chevy, I saved that crop. I then opened with Paint.NET where I applied the Effects Artistic Ink Sketch with full color and lessening the Ink pen.

I upped the Saturation and I Sharpened the image a bit. I then saved it again. I reopened with Corel PhotoPaint. Using the KPT Collection's Lens Flare to add a flare touch. I Inverted my signature to white and added it and saved the large iteration.

I opened with Corel PSP Pro X3 and I Sharpened with High Pass Sharpen. I also added the title and copyright to the EXIF image information using Image, Image Information.

My next photograph, Vintage Chevy Pickup Truck, I opened in Picasa and applied the HDR tool. I decreased the Radius and Strength. I saved that iteration and opened with PSP Pro X3. I applied the Digital Camera Noise Removal. Then I used the High Pass Sharpen tool on the image. I increased the Saturation by a third. I added my signature with Visible Watermark tool.

From the Organizer in PSP Pro X3 I next chose a close up of a Carmel and Brown Coupe, of which I know little. I cropped this as I took the photograph because the owner had a McCafe cup on top of the roof. But I really liked the Harley Davidson Eagle parking lights.

I used the Digital Camera Noise Removal, Smart Photo Fix, and High Pass Sharpen on the image. Then I applied the Saturation Vibrancy for a punch to the color.

I hope you enjoy the photographic images I have from the 2013 Dream Cruise. I have more to post and will be away from the Guitar motif for a while yet. Thanks for looking! Remember to click on the images for a larger view!

Tuesday, August 20, 2013

"2013 Woodward Dream Cruise, Various Cars I" Corel PSP Pro X3 - Paint.NET

1979 Monte Carlo

HDR Wine Coupe

Chevelle SS


I was able to attend the Detroit Woodward Dream Cruise for 2013 and garner some photographs of automobiles. I used our Canon Rebel XTi camera with a tripod for the photographs.

I will be sharing sets of these images, after my working on them for differing effects in my next number of posts. I will try to explain that workflow.

With this 1979 Monte Carlo, belonging to my Brother in Law, I used Corel PSP Pro X3 for some adjustments. I used the Digital Camera noise removal, and the Smart Photo fix. I also boosted the Saturation with the Vibrancy set at about a third.

The Wine Coupe I also did in PSP Pro X3. I used two exposures to create one HDR image. I also used the Noise Removal, Smart Photo Fix and the Sharpen High Pass on it.

The Carmel and Black Chevelle Super Sport I opened in Paint.NET and applied a light Ink Sketch to the image. I adjusted the Curves for depth and increased the Saturation a bit. I applied KPT Collection's Lens Flare for some color as well.

As I took quite a few photographs of the cars in my area I will be posting more Automobile images in my posts. I hope you enjoy them!

Monday, August 12, 2013

"Digital Painting 12-String and 6_String Guitars" Corel Painter - Plus

12-String and 6-String Guitars

I browsed my guitar photographs and opened this one in Corel Painter 11. I digitally painted it there and used the following steps. I used my Wacom Tablet to paint with.

  • 1. Corel Painter 11
  • A. Brushes
  • 1) Two Airbrush variants
  • 2) Two Digital Watercolor Brush variants

  • 2. Picasa 3.9
  • A. Warmify
  • B. HDR 
  • C. Cinemascope

  • 3. Corel PSP Pro X3
  • A. Fit to window
  • B. Effects
  • 1) Speckles Brushstrokes
  • 2) Texture - Hatching
  • C. Adjust
  • 1) Saturation - Vibrancy
I added my signature in Corel PhotoPaint in White, resizing to display size for this post.


Friday, August 9, 2013

Artists in the Plus "In The Spotlight with Nicole Monroe" Picasa - Corel

In The Spotlight - Nicole Monroe


I missed the live show but caught it on YouTube. This Singer Songwriter can sing and play! I took a Picasa 3.9 full-screen capture and did some editing there.

I cropped the image to fit, and applied Warmify for color. I used the HDR tool with a slight radius and no fade. I then applied the Museum Matte framing to the image and saved it.

From Picasa I opened with Corel PSP Pro X3 applying the Smart Photo Fix and boosted color. I used the Skin Smoothing tool and the Digital Camera Noise Removal tool as well. I added my signature and saved again. I then resized for display and saved that iteration.

If you, too, missed the live show, here is the link to YouTube:

https://www.youtube.com/watch?v=MIQdQQ3txiw#at=256

I want to apologize for not posting as often, Things have been busy this month! As I am certain it has been for others as well. Thank you for your patience.

Saturday, July 27, 2013

"Stones Dirt and Flowers" Picasa - Corel PSP Pro X3 - Plus

Stones Dirt and Flowers


Stones Dirt and Flowers, is the title of today's image. Another floral photograph from our garden. The purple flowers just planted themselves there and grew next to the Black-eyed Susans.

After I selected this shot I used Picasa 3.9 HDR tool and adjusted the radius a bit. Then I applied the Lomo effect in Picasa. I saved that and opened the photograph in Corel PSP Pro X3.

Here I adjusted the Curves for depth, and Saturation for Vibrancy (about a third.) It really brought out the purple flowers and subdued the yellow of the Black-eyed Susans.

I saved that iteration. I opened with Corel PhotoPaint to add my signature in White. I saved that and reopened in PSP Pro X3 to adjust the size for display and add some information to the EXIF data. I saved again.

The Guitar motif will have to wait until I get the bug again, which won't be long.

On an interesting note gatzkART! has surpassed 110,500 Pageviews this week! Thank you for your views and interest in the workflow.

Thursday, July 4, 2013

"Artists In The Plus - Studio Sessions with Tom Strasser" Picasa - Corel

Studio Session with Tom Strasser


+Artists In The Plus +John Voshell +Tom Strasser

Image manipulation with Picasa 3.9 and Corel Products


  1. Full Screen Capture in .BMP converted to .JPG
  2. Cropped
  3. Warmify
  4. HDR
  5. Lomo
  6. Museum Matte


Signature added in white - Corel PhotoPaint
Softened in Corel PSP Pro X3

NOTE: This is a "G" rated blog and some swearing was in the show so I did not include the YouTube link. But you can follow +Artists In The Plus for links.


Tuesday, July 2, 2013

"In The Spotlight" with Christina Cecrle Picasa - Corel

"In The Spotlight" with Christina Cecrle


"In The Spotlight" with Christina Cecrle

Hosted by +Artists In The Plus Interview by +John Voshell

Full Screen Capture in Picasa 3.9 as .BMP converted to .JPG

  1. Cropped
  2. Warmify
  3. HDR
  4. Lomo
  5. Museum Matte
  6. Signature added in Corel PSP Pro X3


Wonderful show you may have missed:

https://www.youtube.com/watch?v=voIZD0Phg4w#at=78

Tuesday, June 25, 2013

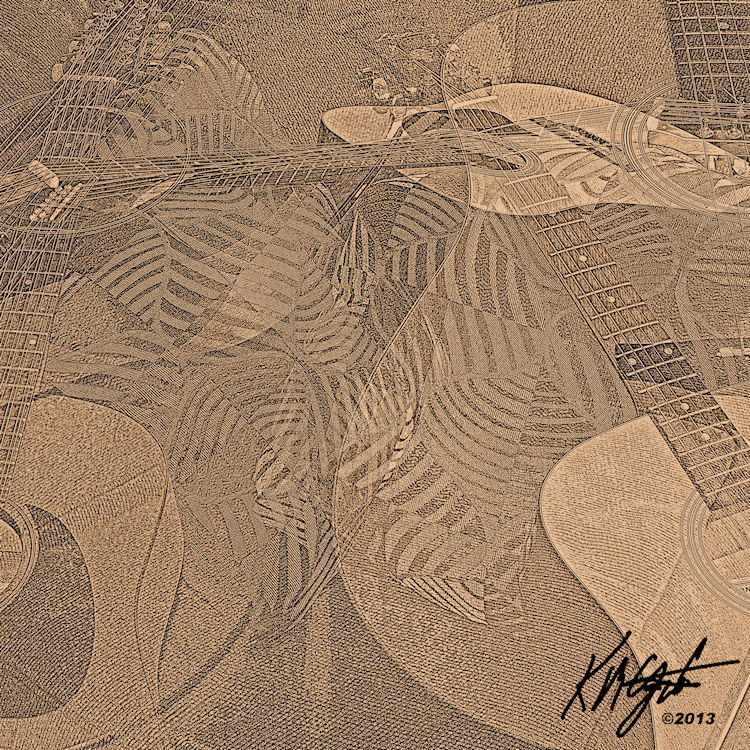
"Digital Collage Guitars Mashup" Corel - Plus - Open G Tuning Instrumental

"Digital Collage Guitars Mashup" Corel - Plus


Today I am sticking with the motif of Guitars. I opened Picasa 3.9 and using the Collage function I browsed to the folder of my Guitars photographs and holding the Ctrl key I selected a number of landscape photographs. Then I chose Create Collage. I selected a Mashup of all the photographs the size of a CD cover 72 dpi with 5120 x 5120 size.

I pressed the key to create the collage. I applied the HDR tool for effect. I used the Pencil Sketch tool to show the outlines of the various guitars making up the overlaid collage. I saved that file. I opened with Corel PhotoPaint. 

There I increased the sharpness with Adaptive Sharpen, to show the strings and headstocks more clearly. I used the Tone Curve to deepen the tones. Saving this iteration I opened with Corel PSP Pro X3.

There I played around with a few Effects and was not satisfied with the results. I applied the Photo Effect Sepia for color. Then I used the Saturation tool Vibrancy to add to the color a bit.

Using the Visible Watermark I added my signature. I saved again. I resized for display on the blog.

Lastnight I was able to find time to play my 12-String in the Open G tuning. I used my Toneport UX1 and the Gearbox software and selected a Clean Guitar tone called "Bad." I turned up the volume and the Bass for the drone of the open tuning.

I found a drumming file I had created from a snippet of real life drumming lasting about 4 minutes. It begins with a Jet Plane like sound that I had made while playing around with sounds, then the drumming comes in.

I opened Audacity and loaded the drum background importing the file. After some playful practicing with the Open G tuning I had a number of chord structures to play with.

I started the recording and built from a softer beginning to a uptempo rhythm. Using the chords I had practiced I recorded for about 4 minutes. I saved as an Audacity Project to my external drive and then converted to an MP3 for playback. I titled it "Late Jet." I saved this MP3 to my Current EP songs titled "Celebrate Now." And using my Headphones for playback I listened to the results. I was pleasantly surprised with the mix. SoundCloud Link:  http://soundcloud.com/gatzka-music/open-g-late-jet


Sunday, June 9, 2013

"HDR, High Contrast 12-String Guitar" Picasa - Corel

HDR High Contrast Seagull C12 Guitar


I shot this photograph of my Seagull C12-String Guitar with our Canon Rebel XTi. I am trying to leave the EXIF data available for this photograph. I enhanced it in Picasa 3.9 with some of the tools there available.

I used the Saturation tool turned up as high as I could take it. Then applied the HDR tool for more contrast. I used the Glow tool for adding more light to the HDR. Then I applied the Vignette tool for framing.

I opened in Corel PSP Pro X3 and added my title, Artist's name and copyright to the EXIF info with the Image Information feature. Using the Visible Watermark I placed my signature in the upper right corner for clarity of marking. To finish the image I added some Texture to it using PSP's Effects Texture tool.

If you examine the image closely you can see pick scratches on the front of it below the soundhole. Also some wear on the soundhole surrounds themselves. Some say, as this comes from playing the guitar, that it adds Character to it. I like that idea, not a pristine underplayed guitar but one that has seen its licks and strums.

You can also clearly see my Etching of the Bird and Florals on the Pickguard that I added to it freehand. More Character? Perhaps. But it definitely is MY guitar and has my marks on it! It's my best musical Friend!