Pages

Showing posts with label pencil. Show all posts

Tuesday, December 29, 2015

"Bonamassa and Friends - Slow Train Acoustic" Painter Essentials 5 Plus

Bonamassa and Friends - Slow Train Acoustic


"Bonamassa and Friends - Slow Train Acoustic," is from a screen capture I took watching a video of the performance. I opened in Picasa 3+ and used the Pencil Sketch tool on the image. Saving that I opened the black and white piece in Painter Essentials 5.

I Hand Painted on the Canvas Layer using the color palette in Essentials. Brushes used were the Chalk and the Diffuse Water Brushes set at varying small sizes and Opacity. I painted each Individual with my choice of colors and the same for the Lighting.

I saved that and then created a second layer, filling it with a Light Gray color. I used the property Multiply on that layer for transparency. Then I dropped all layers and saved the Large file again.

Next I opened the file in PhotoPaint and Hand Painted more of the background, using the eyedropper to select colors. I used the Light Turin Cover Brush to hand paint. All color choices were mine, not from the original screen capture. I used the Tone Curve for depth to the colors and increased the Saturation by 15 for a punchy view. I saved this iteration.

As Picasa was still open, I used the Museum Matte for the matte and framing, saved again. In PhotoPaint I added my signature layer, sized and placed it using the property Add for transparency. and I saved the Large piece again.

I resampled the file in PhotoPaint for display at 96dpi, 75 compression, 25 smoothing, saved as a JPG. Be certain to click on the image for the Larger view of all the details and textures! Thanks!


Monday, October 26, 2015

"Steps and Settings: Late Autumn Walker On a Dirt Road." Corel

"Late Autumn Walker On a Dirt Road."


I've had a busy weekend so not much time to work on any Digital Paintings. Today I started about 12:30pm to work on the computer and I found time for one. The photograph is from Morguefile Free Photos, a landscape. It depicts a "Late Autumn Walker On a Dirt Road."

I opened in Corel Painter Essentials 5 and tried a few settings for the image. I settled on an Oil Painting, Concrete Paper Texture, choosing from the Photo Painting Brushes I picked the Grainy Variable Pencil. The Opacity was set at 74% and the Grain to 12%. I then Digitally Painted this piece using those settings.

Saving the large iteration I opened in Corel PSP Pro X3. Here I decided to add an Ornate Frame with the Inside Image setting. I opened and copied my signature and Placed as New Layer into the piece. I resized it and placed it and applied the Property setting Lighten for transparency. I merged the layers.

Next I used the Smart Photo Fix tool and upped the colors. And I used Increase to RGB 16-bit on the whole image.

I like the museum look and feel of the Ornate Frame, and the colors and detail of the Grainy Variable Pencil within the making of this image. I saved the large iteration and then resized for display.

Friday, January 23, 2015

"Taylor Guitar Player Pencil & Texture Blend" Corel

Taylor Guitar Player


I looked through some of my photographs from the Taylor Road Show, at Motor City Guitar, I selected this one. I opened it in Corel PSP Pro X3. There I decided to use some of the Effects available and I selected Pencil for the base image. It created almost an embossed look and feel to the photograph. All my Show photographs were taken with my Canon Rebel XTi DSLR.

I then looked through some new Textures I had received from Friday Freebies StockVault. I grabbed this incredible Blue Texture. I did this the other day and I believe I used the blend property of Multiply with Opacity adjustments.

I also applied Saturation Vibrancy for a slight boost to the colors. I added a black border and my signature, and merged all the layers, saving the large iteration. I added Image Information to the EXIF properties. All the work was done in PSP Pro X3. I resized for display here but did not mess with the default compression or smoothing.


Tuesday, January 14, 2014

"Steampunk Art Deco Collage" Dover - Corel

Steampunk Art Deco 1

Something different for my post today. I decided to scan in an Art Deco plate from Art Deco Designs / Edouard Benedictus. I used my Canon MP495 to scan in the Art Deco plate. I selected from my Dover Publications Samplers two persons in Steampunk Underwear. I opened the scan in Corel PhotoPaint.

There I assembled the Collage. I copied and pasted the gal and guy and erased the background before merging them. I added Birds to the upper right corner also from Dover. I also searched for other unexpected pieces and found an old Building and Trees Landscape Pencil sketch in my Picasa 3.9 folders.

I copied and pasted that from Picasa and resized it to fit the entire image. I applied the property Multiply and altered the Opacity and added it to the collage. I added my signature to the piece and saved the large iteration. I resampled to a size for display here.

Art Deco - Steampunk - Dover - and a Freehand Pencil Sketch in Sepia tone, all combined in an unusual Digital Collage.

Monday, December 2, 2013

"Select A Gal To Digitally Paint - Help Me Decide" Corel - Canon

One - Beret Woman

Two - Medium Cut Hair Woman

Three - Pucker 2


I have a favor to ask of you. I would like to use Corel Painter 11 on ONE of these freehand sketches and digitally paint her. So I am asking YOU TO VOTE on which gal you would like to see Digitally Painted for a subsequent post here on gatzkART!


I used my Canon MP495 to scan them in and Corel PSP Pro X3 for some Curve adjustments. I also resized the images for display here, always take a click on them to get the larger view of details. I have the larger images to use in Painter 11, and with a newer Driver for my Wacom Tablet I am ready to paint.

So I am asking for your VOTES as to which one you would like to see in full color. You can leave a comment to vote. And Share the post if you are so inclined.

Thank you for your participation and interest in my creative endeavors! 


VOTE FOR 1; 2; OR 3! 

NOTE: If I get enough votes and know who you are you may win an 8.5 x 11 color print of the One selected after I paint it! VOTE NOW!

Friday, November 29, 2013

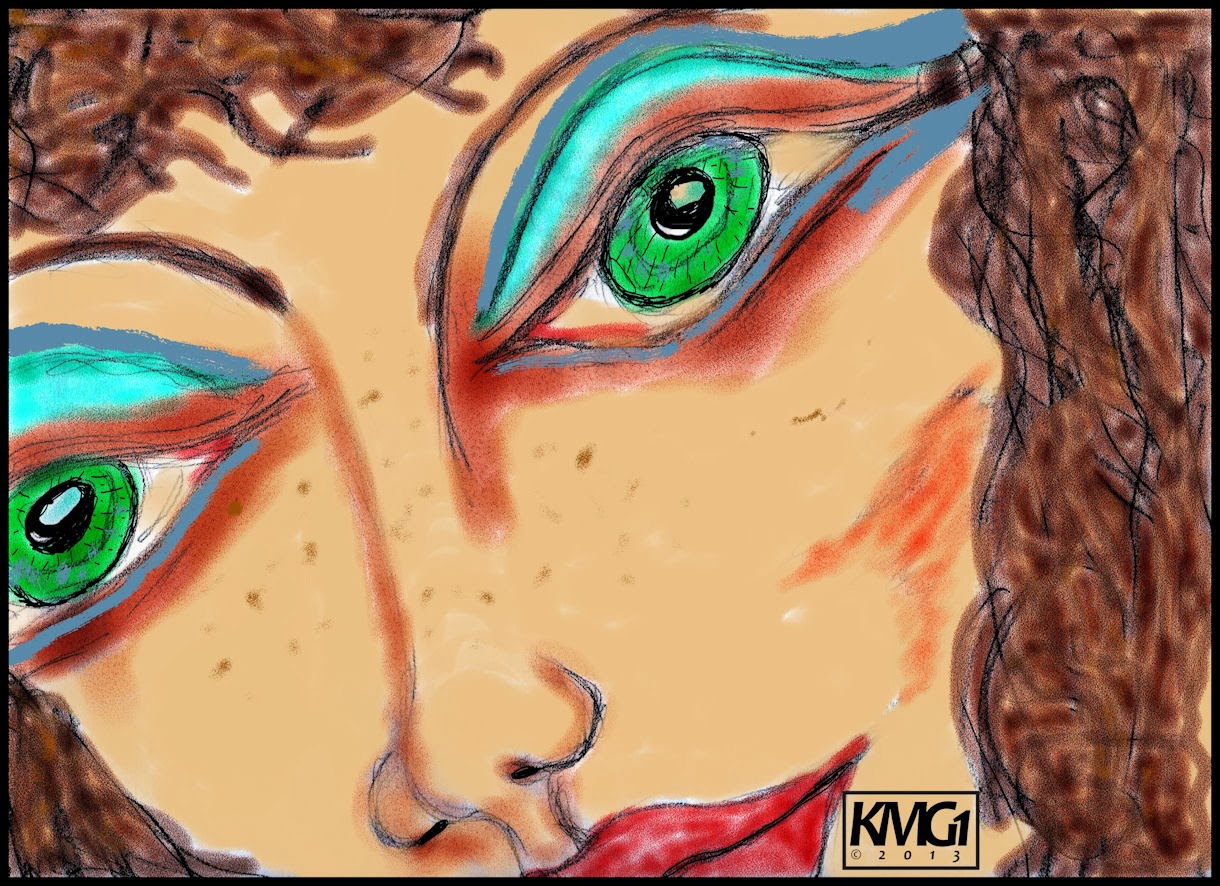
"Eye, Nose, Lips 1A," Canon - Corel

Eyes, Nose, Lips 1A


Throughout my Archives I keep finding images, many pencil sketches, of interest to me. I found four today and selected the image you see. "Eye, Nose, Lips 1A," is a pencil sketch of unknown date. I scanned in the pencil sketch with my Canon MP495 with a small amount of cropping. I like the way the face fills the screen, viewed in large mode.

I took this scan and opened it in Corel Painter 11. There I used Watercolor Brushes, Tinting Brushes and Liquid Ink Brushes on it. I painted it for bold color but fairly realistic coloring. I used Painter's Mixer to blend up a flesh tone for the Tinting process for the face. I applied the Liquid Ink as Eye shade color and freckles, using the palette I created with the flesh tone. I saved that iteration at 300dpi.

I opened CorelDRAW to create an Initials copyright symbol. I used Candara Font and drew the characters closer together. I added the copyright symbol and date expanding the characters to fit. Then using a bold line I drew a box around the Initials and copyright. Grouping that I saved it as a native CDR file. Copied and pasted it into the image.

I saved the file again. I opened with Corel PSP Pro X3 and added a 25 pixel black border. Using the Image Information I added a Title, Copyright Information, and Equipment and programs used to create this image. Saving that at the large size I resized to display here and saved that file.

So here I am sharing another older image with a new twist to it, the Corel Painter 11 twist. I used my Wacom Tablet which is ancient and acts like a mouse (i.e. no full screen coverage,) but it still paints better than a mouse.

There is no driver for my Wacom Graphire tablet for Windows 7 32-bit, so I use it carefully as I paint, moving my hand position to the part of the screen I need to be at. It is tedious but worth the time it takes and it paints nothing like a cumbersome Mouse.

NOTE: I researched for a compatible Wacom Driver and selected an older Driver that was compatible with Win XP; I downloaded that and it installed with that compatibility set. Now My Wacom Tablet is working as it should covering the entire screen and is very sensitive to use, more than previously. Kudos to Wacom for this Driver! 

Tuesday, November 26, 2013

"Freehand Drawing Vintage 1980, Acrylic coated Pastel Man" Corel - Canon

Old Man Sleeping India

Pencil and Pastels Man Acrylic Coating


Digging through my past works that my son found stored away I have these to share today.

"The Old Man Sleeping India," was a freehand drawing made from a photograph that my Dad took while stationed in India during the Korean War. It is a circa 1980 Color Pastels Pencils Drawing.

The second image is a fictional "Man's Portrait," done freehand in Pastels, this was drawn on old packing paper, with the brown of the paper showing through. I took a few photographs of it and this was the clearest, I used the flash so you can see the Acrylic Coating Media I used to preserve it.

With both photographs, taken with my Canon Rebel XTi, I adjusted in Corel PSP Pro X3. Cropping, some color enhancements with Saturation, and a framing with boarder on the second image.


Saturday, November 23, 2013

"Freehand Drawing Retro Pencil Sketches" Corel - Canon

Blunt Cut Hair Woman Pencil

Large Eyes Man Pencil

MAC - Amiga - IBM Computers on Iceberg

Not much to explain in the way of workflow on these Retro Pencil Sketches. I scanned two of them in with my Canon MP495 and captured the third with my Canon Rebel XTi camera.

Some adjustments made in KPT Collection, Corel PhotoPaint, Corel PSP Pro X3; in regard to sharpness and clarity and size for posting. As you can see the Pencil Sketches are from 1998 and I don't recall the original date of the Computers Sketch.

I wondered about where my thought process was when I added the Three Competing Computers on an Iceberg! Go Figure! Computing power has come a long way since this MAC and Amiga and IBM PC!


Tuesday, November 19, 2013

"Pucker 1 - Freehand Young Woman" Corel, Canon

Pucker 1

Found images are so much fun sometimes! Here is a "Young Woman With Puckered Lips," ready to give a kiss to someone. Who? I don't know, he is not the subject of the image. I did this circa 1990's and scanned it in with my Canon MP495 into Corel PhotoPaint. I adjusted the Tone Curve for depth and added my signature and saved the large iteration.

I opened in Corel PSP Pro X3, using Saturation Vibrancy on it for a boost to the colors. I saved with Image Information that iteration. Then I resized it for display.

This was a fictional gal, done freehand with Pencil, Pen and Ink and Pastel Pencil. I am glad I ran across her sitting loosely in my files and not still in a Journal. A delightful subject.

Sunday, November 17, 2013

"Man Pencil Sketch - Painted" Corel Painter 11

Man Pencil Sketch

Man Pencil Sketch Painted


Journals give one insight into the past and inspiration for the present. This "Man Pencil Sketch," is circa 1996, but with an updated copyright on it. Why? Because I am reusing it in a new format, a scanned in image using my Canon MP495. I did this in Corel PhotoPaint and adjusted the Tone Curve to enhance the shading, adding my signature, too.

Saving the large iteration, I opened in Corel Painter 11 and used Tinting brushes and Watercolor brushes to paint this image. I used Corel PSP Pro X3 for adding Image Information like Title, Artist, Copyright, and programs used. I also resized in PSP Pro X3 for display here.


Friday, November 15, 2013

"Woman Pencil Sketch Digitally Painted - Compare" Corel Painter 11

Woman Pencil Sketch Painted and Framed

Woman Pencil Sketch Before Painter 11 

Journals are fun to browse and find interesting doodles and sketches you've done before. I scanned in this Woman Pencil Sketch with my Canon MP495 and decided to paint it in Corel Painter 11 ( still have not been able to upgrade to the latest version.)

Since I lost my custom brushes on upgrading to Windows 7 32-bit (my own fault for not backing up my brushes folder,) I used the standard Watercolor and Digital Watercolor Brushes along with some Tinting Brushes for a color version. I do love the Ornate frame I chose to frame the painted version. But I have to say that there is something to be said for the Woman Pencil Sketch all on it's own. It seems special all by itself, to me.

I added Image Information to the images in Corel PSP Pro X3 and saved the large iterations, unframed and framed. I resized for display with my signature, though the original sketch was done circa 1996.

If you have a favorite let me know! Comments are always welcome. 

Monday, February 25, 2013

"Guess the Artists In The Plus" Corel - Picasa 3.9 - Plus

Five Artists in the Plus Performers

Today is a guessing game image. I have five +Artists In The Plus  performers in my Digital Collage. You can guess who is whom and make comments below if you recognize any of them. The face recognition tool could not pick them out at all!

Take your best guesses by looking at the larger image on the blog gatzkART! To make this Digital Collage I followed the workflow described below.

I grabbed one of my Mayang's Textures this afternoon and opened it. Using Corel Painter Photo Essentials 4 I auto painted the background texture. I saved that large file and opened in Corel PSP Pro X3 and used the Smart Photo Fix on it and rotated it to Portrait. I saved that iteration.

From Picasa 3.9 I opened the file in Corel PhotoPaint. Then while in Picasa I went to my folder of screen captures of Artists In The Plus performers. In Picasa I cropped, used the Warmify and HDR tools. I then applied the Pencil drawing tool to each of the performers images.

I did each one individually, and copied and pasted onto the background in PhotoPaint. Then I sized them to fit, placed them in no order of importance. Using the property Multiply I made them transparent, except the pencil sketches. I merged them after I was happy with the composition and placements. I saved that iteration.

I used the plugins from Filter Forge Photo Effects for Vibrancy and using Frames I added a Grunge frame to the image. I inverted my signature to white from black and added it to the large file.

I saved that, then I opened in PSP Pro X3 and resized to display size for the blog.

Take your best guesses and comment on Google+ or my blog page. Pluses and Shares are welcome.


Friday, February 8, 2013

"Yamaha Portable Grand Piano" Corel - Plus

Yamaha Portable Grand Piano

I've been on a Sepia kick with some of my images lately. I browsed in Picasa 3.9 to photographs of my studio/office. I opened this one with my Son's Yamaha Portable Grand Piano in it. I used Corel PSP Pro X3 and created lineart with it. I played around with the Levels and added a Polaroid frame and a black border to it. I saved this large file.

I opened it with Corel PhotoPaint and used Filter Forge's Photo Effects Sepia with the darker tone. It darkened the framing as well. I like the look and feel of this image now. I added my signature in black before I adjusted the Sepia Tone. I resampled to display size in PhotoPaint.

This Piano is no longer in my studio and I miss having it, though I am not a keyboardist. I did enjoy playing on the Piano with all it's settings and helps with beats and chording. Such Fun!


Friday, February 1, 2013

"Double Drop D Guitar Collage" Corel - Plus

Digital Collage - Double Drop D

For today's image I created a Guitar Digital Collage in Picasa 3.9. Using the recent photographs of my 12-string Seagull Guitar I selected the photographs and chose Create Collage in Picasa. I switched to the 8X10 portrait setting with a central photograph the Picasa made the large collage from my selections.

It auto saved the draft and I opened the finished collage in Corel PSP Pro X3. There I applied the Smart Photo Fix and loaded the image as another layer. To that the Smart Photo Fix was applied and I used the Pencil tool to create an overlay. I altered the colors to a Psychedelic look and feel. I merged the layers with the enhanced colors. I saved that iteration.

I reopened from Picasa with Corel PhotoPaint. there I used the Wand tool to select the white space and filled with a Stucco filling from their Sample palettes. I added the paint splatters to the image and changed their opacity and added drippings. This was for that Grunge effect.

I then scanned in some blank chord charts, four of them in a group, and added some Double Drop D chord markings. The first chord is played like an Am on the first fret then the second is the same form slid up to the third fret. The next chord is the A shape played on the fifth and seventh frets.

I used the property Multiply as I copied and pasted the chord form onto the guitar background, sizing it large enough to read and using black. I added the Double Drop D Tuning phrase and added the dripping using the Distort, Wet Paint, tool. I merged the chords and phrase into the background.

I saved the large iteration, then on the display size added my signature and saved that with a differing file name.

A Double Drop D song I have been working on. This is the first draft:

https://soundcloud.com/gatzka-music/does-anybody-know

I'd like some input on this first draft from +James Olmos +Tim Behrens If they would chime in. Contact by email +John Voshell has it and has my permission to share with you both. +Mark Ferrasci may want to listen as he helped in the creative process of this tune, his opinions are welcome too.

Comments and Pluses welcome!

Tuesday, January 29, 2013

"Stringed Instruments in Foliage" Corel - Plus

Stringed Instruments in Foliage

Returning to the Guitar motif I used a couple of photographs of an unknown stringed guitar like instrument, and three classic guitars. I opened with Picasa 3.9 from my folders and used the Pencil tool on both. Saving them both I opened the largest with Corel PhotoPaint, there I applied the Tone Curve to deepen the line color.

I opened the other of the three guitars and pasted and erased unwanted background elements, resized them to fit and pasted. I saved that iteration and used Corel PSP Pro X3 for the sepia tone and vibrancy of the tone. I added a brown border there as well.

Saving that I used Picasa to add to the sepia depth. Back in PhotoPaint I added my signature first changing the color with Replace Colors tool. I cut and pasted the large file. I had resized to display in PSP Pro X3.

Simple changes made for an attractive Sepia toned image.

Thursday, December 27, 2012

"Textured - Colorized 12-String Guitar" Corel - Plus

Gouache Painted 12-String Guitar


With a pencil sketch of my 12-String Seagull S12 Cedar guitar, I did some processing to make a colorful image. Using Corel PhotoPaint I Rotated to Portrait, then applied the Tone Curve for additional detail. I saved that and opened with Corel Painter Photo Essentials 4 and auto painted with the Gouache settings.

This gave me the brushstrokes texture I wanted. I saved that iteration and reopened with PhotoPaint. Here I used Filter Forge's Photo Effects Colorizer plugin. I got the result of a brightly colored image. I added my signature and saved the display size.

I decided to add some more texture to the image so I selected the Effects Texture Canvas and added a stone-like texture to the piece. This satisfied my playfulness in doing an image and gave it some punch.

Monday, April 9, 2012

"12-String Digital Watercolor" Corel Painter Photo Essentials 4 - Corel PSP Pro X3

12_String Digital Watercolor


I found this photograph today on my external drive. I opened it in Corel PhotoPaint and rotated it to a portrait and cropped it. Saving that file, from Picasa 3.9 I opened with Corel Painter Photo Essentials 4 and adjusted the color with Equalize, lightening it. I then auto painted with Wet on Wet Watercolor. Added the Pen and Ink lines with a Pencil brush. Then added more color with the Colored Pencil thicker brush.

I saved that iteration and opened with Corel PSP Pro X3 to add my signature, the Polaroid frame and the black border. Saving the large file and then resizing for display.

I like the "1990 Seagull 12-String S12 Cedar," for a motif and was glad I rediscovered this photograph. Painter Photo Essentials 4 is a fun program to use to layer differing styles of imagery to create a one of a kind image.

Listening --- Kirk and Keir Gatzka --- Be Kind, Be There

Sunday, March 11, 2012

"Bird and Floral Watercolor" Corel Painter 11 - Corel PSP Pro X3

Bird and Floral Watercolor


A fourth in my Digital Watercolor Bird series. I again used clip art from Dover Publications and resized and used the Pencil feature on in Corel PSP Pro X3. I increased the pixels to 180dpi and saved the larger file. I opened with Corel Painter 11.

In Painter I used Digital Watercolors to paint the pencil sketch. I used various brushes and sizes, but kept the colors saturated. I used the Salt brush on the background layer (set at Multiply) to add sparkle and texture to the painting.

I saved that file and re-opened in PSP and added the mat and frame using the Picture Frame feature. I saved the large file and resized for display.

I am featuring this and the others in the series on Zazzle, and Fine Art America, as posters and prints and greeting cards. Please see My Art For Sale page for the links to these.

Listening --- Kirk Mathew Gatzka --- UJam Series My How Time Flies

Friday, February 17, 2012

"Mother In Law as a Young Lady" Paint.NET - Corel Painter 11 - Digital Watercolors

Mother In Law as a Young Lady


This is an old photograph I scanned in with my Canon MP495. It is my Mother In Law as a young lady. I took the image and opened with Paint.NET and used the Effects; Artistic; Pencil Sketch on it to simplify the picture.

I cropped that to focus on her face and hair. Saving that file I opened with Painter 11 and used Skip Allen's Digital Watercolor brushes to paint it. I used the Flesh Tone palette and the Gray Range palette for the colors, with a couple of selections of my own for the reds.

I varied the brushes and the size and Opacity as I painted. I kept the image simple and painterly as I could. If you look closely you can see some of the noise of the original photograph left in the background. This gives it an elegance it might not have had if I had blurred or softened the photograph more.

My Mother In Law was an out-spoken and straight-forward person. Here I see her as a young lady who loved to dance and have fun. She is now deceased and missed. My wife helped me with this by being a by-stander as I painted.

Listening --- Sheryl Crow --- Mother Nature's Son

Wednesday, July 6, 2011

A Journey Called Collage - Acoustic Guitars - Music - Painter 11

Click for Larger Image

In taking the course at Digital Arts Academy, A Journey Called Collage, I am learning to use Painter 11 techniques for digital collage. Yesterday's collage was based on guitars and so is today's piece.

This is based upon Lesson 3 of the class. Using Layer Masking for a portion of the work. I used photographs of my own guitars and turned one into a pencil like style for the main focus.

I added music and texture to the piece painting on layers, masked and otherwise, with the Chalk brush. I made special paper textures for this image of both acoustic guitars and a piece of Dover Clip Art of sheet music. I kept the color scheme ocher oriented.

I also added with the property Multiply a painted guitar which I placed into the image and copied and pasted three times. I added a thin frame from Filter Forge's frames. The original image is 8" X 10" at 150dpi, I resampled for display here.

Listening --- The Early November --- Ever So Sweet