Pages

Showing posts with label freehand. Show all posts

Tuesday, December 29, 2015

"Bonamassa and Friends - Slow Train Acoustic" Painter Essentials 5 Plus

Bonamassa and Friends - Slow Train Acoustic


"Bonamassa and Friends - Slow Train Acoustic," is from a screen capture I took watching a video of the performance. I opened in Picasa 3+ and used the Pencil Sketch tool on the image. Saving that I opened the black and white piece in Painter Essentials 5.

I Hand Painted on the Canvas Layer using the color palette in Essentials. Brushes used were the Chalk and the Diffuse Water Brushes set at varying small sizes and Opacity. I painted each Individual with my choice of colors and the same for the Lighting.

I saved that and then created a second layer, filling it with a Light Gray color. I used the property Multiply on that layer for transparency. Then I dropped all layers and saved the Large file again.

Next I opened the file in PhotoPaint and Hand Painted more of the background, using the eyedropper to select colors. I used the Light Turin Cover Brush to hand paint. All color choices were mine, not from the original screen capture. I used the Tone Curve for depth to the colors and increased the Saturation by 15 for a punchy view. I saved this iteration.

As Picasa was still open, I used the Museum Matte for the matte and framing, saved again. In PhotoPaint I added my signature layer, sized and placed it using the property Add for transparency. and I saved the Large piece again.

I resampled the file in PhotoPaint for display at 96dpi, 75 compression, 25 smoothing, saved as a JPG. Be certain to click on the image for the Larger view of all the details and textures! Thanks!


Thursday, December 24, 2015

"Violin Close Up" Painter Essentials 5 Plus

Violin Close Up


Continuing in a Musical frame of mind, a free to edit photograph of a "Violin Close Up," was used. As you can tell from my last couple of posts I like Musical themed images, and I like Digital Watercolor with variations of Brushes used.

I opened the photograph in Painter Essentials 5, selecting the Watercolor Sketch set. I picked from the Acrylic and Oils Brushes the Wet Oily Brush and Digitally Painted the piece. I added back in details of the strings, bridge, and sound hole using the Photo Painting Brush Soft Cloner, painting by hand.

I hand painted the surrounding background using first the Digital Watercolors Brush - Wash Brush. I continued to paint using the following: the Spatter Water Brush, the Pencils, Pens and Markers Brush Dry Ink, for the Ocher-like hatching. I also used the Photo Painting Brush - New Simple Water to tone down the Blue watercolor a tad. As you can see a Paper Texture was used during the entire process.

Saving that large file, I opened in Paint.NET and added my signature layer with the property Multiply for transparency, and merged the layers. I saved that iteration to Post.

My notes here are incomplete, but I am certain I used Irfanview to Resize/Resample the piece for posting size at 72.dpi JPG.

As always I encourage you to click on the Image for the Larger view to see the details and textures clearly.

If you haven't listened to any of my songs listed in the CDBaby Kiosks below they are Full song Previews for you to have a listen. Just scroll to the Kiosks below and select a song you haven't listened to yet and sample my Independent Alternative Folk/Rock Music.

Thursday, November 12, 2015

"How this was done: Sister in law and Younger Brother" Corel

Sister in law and Younger Brother


I was visiting my family up north in Farwell, Michigan and received some photographs from them for our albums. I took them and scanned them in using my Canon MP495 All-in-One. I set the scans for 300dpi and saved them to a Family Photo Folder.

I opened this portrait in Corel PSP Pro X3. The first thing I did was to crop the image, ridding it of some of the White Sky on the top of the original photograph. I applied the Smart Photo Fix:
  • Brightening
  • Increasing shadows
  • Upping the color a bit
I then used Adjust Curves for Depth, and  Saturation Vibrancy set at +20 for greater color.

I next opened the altered photograph in Corel Painter Essentials 5. First I tried a Pastel Drawing:
  • Chalk, Pastels and Crayons Brushes
  • Selecting the Sharp Charcoal Pencil Brush
  • size 7.0
  • opacity 100%
  • grain 25%
  • Clone Color from Source Image
I digitally painted the image for the first time, saving the iteration.

I next decided I wanted to experiment with the Modern Painting settings in PE5:
  • I painted from the Clone Color Source Image
  • After that was done I could see where more detail was needed
  • I Selected Photo Painting Brushes
  • Soft Cloner
  • And I Hand painted the Details back in with the setting for the Cloner Brush:
  • Size 15.7
  • Opacity 24%
I liked the resulting image, very painterly, and still with more details for the Faces, making a better portrait of my subjects. I saved that iteration with a differing name.

In PSP Pro X3 I added my Signature as a layer and sized and placed it with the property Multiply, merging and saving again.

As you can see I have used a combination of Narrative and Outline description of the process, workflow explanation. I hope you find it easier to follow the steps I took for this photograph to Digital Painting.

Musically I recently found online, three songs to learn to play on my Seagull 12-String Guitar and sing along in accompaniment. They are:
  • Good Riddance, Time of Your Life: by Green Day
  • I'm Fixing A Hole: by the Beatles
  • Big Yellow Taxi: by Joni Mitchell - the Counting Crows version 
I am hoping this warmer weather continues as my Studio/Office gets pretty chilly this time of year. I would be more apt to practice and record Covers for my own enjoyment if it remains warmer in here!

The last poem I wrote, is not good fodder for lyrical or melody development, so I await until a new song strikes me for writing and recording. 

Monday, November 2, 2015

"How to: Freehand Oil Pastel with Watercolor Paper Texture" Corel

Freehand Oil Pastel with Watercolor Paper Texture

Today I spent some time looking through some Older Freehand Drawings of mine done in various mediums. I found a color Oil Pastel Drawing of a Fictional Man's Portrait I had done, without a date on it. I know I had done it some time ago, but don't remember what year I drew it in.

I had just recently received some very nice Watercolor Paper Textures from Stockvault's Friday Freebies. I wanted to use one as they are new to me. I opened Corel PSP Pro X3 and went to my Textures folder, selecting one I loaded it into PSP Pro X3.

I then scanned in the Freehand Oil Pastel Drawing into PSP Pro X3, with Acquire Twain. I scanned at full color. After it loaded into PSP I resized it to 75% of the original, copied it to the clipboard and pasted as New Layer on the Watercolor Textured Paper. There I adjusted the placing for best effect and viewing, size matching the size of the Watercolor Texture Paper.

I then applied the Layer Property Multiply for transparency to allow the Watercolor to show through. Using Adjust, Smart Photo Fix I altered the Layered Portrait. Settings were: Brighter +23; Shadows -30; Highlights +20; Saturation +50; Focus Original 50; these were to my satisfaction and applied. I merged the two Layers.

I then loaded my Signature File, copied to the Clipboard and Pasted as a New Layer onto the image. I Sized and Placed the Signature, applying the Layer Property Multiply, and merged that with the piece. I saved the piece as a 300dpi RGB 8 bit JPG file.

I looked at it enlarged in Picasa Viewer and decided it needed a small Black Border, I added that at 10 pixels wide. I saved the large image again. Then I resized for display on the blog and other Social Media.

If you like the piece please Share it to Facebook, Twitter, or Google+, or any other Social Media you use. If viewed on a Computer you can share it in multiple ways as a link. Be sure to click on the Headline to make certain you are sharing only this particular post. I you desire to browse my other artworks and posts click the HOME button and scroll down to the Tag Cloud for reference to differing subjects, or use the Search tool for specific searches.

While you scroll down on the pages you will notice my CDBaby Kiosks of some of my Music. The first one will play four songs in a row in Full Preview, the entire songs! Or you can select from the other CDBaby Kiosk for 30 second Previews of all my songs currently available on CDBaby. Select "Playlist," for Full Previews of these other tunes.

Sunday, September 27, 2015

"How to: Anger - Bearded Man Digital Watercolor" Corel

Anger - Bearded Man


I found this photograph, grayscale, on the Morguefile Free Photos site. I was touched by the Anger of this Bearded Man. I decided to paint it to add to my recent collection of Bearded Men paintings. My first step was to open it in Corel Painter Photo Essentials 4 and auto paint it, grayscale, as a Pastel first. I stopped it before it was finished. Then I used the Watercolor Sketch with Dry Brushes set, Rough Paper and finished the auto painting.

I saved that iteration and opened it in Corel PSP Pro X3, I altered the image to a RGB 16-bit format as JPG. Saving that I opened it in Corel Painter 11.

Here I selected the Digital Watercolors Coarse Brush to paint Freehand. It automatically went to my default color Palette with colors, flesh tones and earth tones appended. I used that palette to paint. I like the Digital Watercolors because they paint on the one layer that is loaded and allows you to follow the shadows and features closely.

I selected the colors I wanted for this image as I went painting it freehand with my Wacom Stylus and Tablet. This is an older Legacy tablet that to my delight works in Windows 10! I adjusted the brush and colors as I was moved to. I did not touch the background of the piece as it had a great look and good colors for this image.

I finished painting and saved the large iteration. I then opened in Corel PSP Pro X3 and upped the Saturation Vibrancy by 33 for more punch to the colors. Here I added my signature as a layer, then resized it and merged the layers together. Saving once again I then opened the file in Corel PhotoPaint to resample for display size, saving that iteration as well, with a new name.

It has taken me a few hours to do this particular piece, eventhough it is done Digitally. I also have to remember each step I take so I can relate the workflow in my posts. So I type up the description of that and it takes a bit of time as well. I finished up about 2:00pm EDT, for this posting Saturday, and will schedule it for Sunday. As I will be busy then and I will also post to Google+, Facebook, and Twitter for those who follow my works and descriptions of "How To" do the images later.

Monday, August 31, 2015

"How To - Impressionistic Lighthouse" Corel

Impressionistic Lighthouse


Today I wanted to work on a Landscape, particularly this Lighthouse from Morguefile's Free Photos. I opened the full color photograph in Corel Painter 11. There I Quick Cloned the image, selected the Artists Brushes Auto Van Gogh. Using a small Brush size I used Select Esoterica Auto Van Gogh to auto paint. This gave me a beginning point for an Impressionistic piece.

I changed to the Digital Watercolors Brushes, a Coarse Dry Mop brush. I used a Purple Lavender like color to add some shadowing to the Lighthouse and surrounding area. The image was still very much like the original photograph but with small brushstrokes and now the Lavender shading.

I wanted a more distinct Impressionist feel so I selected the Auto Van Gogh brush again and enlarged it's size. I applied the Auto Painting. I was pleasantly surprised to see how this moved the Lavender color into the Skyline. I adjusted the Exposure a touch in Painter 11 and then saved the large file.

This iteration I opened in Corel PSP Pro X3 and played with the Saturation Vibrancy (33,) and the Curves to add punch to the colors. I saved again and opened this in Picasa for a full screen view. Some of the coloring was too dark. I applied the Smart Photo Fix tool, in PSP Pro X3 adjusting the color, upping it a tad. This also Brightened the image. I added my signature as another layer, sized and fit it, used the property Lighten and merged the layers to one. I saved again to a JPG format 72dpi.

I added a painterly frame and the Ornate Gold Frame to the finished image. This lent it some elegance. I saved this iteration as an 16-bit TIF file and then Resized for display here, saving as an 8-bit JPG.

Be certain to click on the image to enjoy the large view of it. Please remember my Art and Music (10 songs on CDBaby) are For Sale as Posters simple or framed and matted at Zazzle. If you see an image you would like to purchase see My Art and Music For Sale Page for my email to request I post the image to Zazzle for you to buy.

I don't have all my images currently on Zazzle for purchasing, so write me and request the image you would like. Thank you.


Wednesday, August 12, 2015

"Sketchbook Autodesk Freehand"

New Tablet Art, forgive the crude sketch. I have an Android app from Autodesk called Sketchbook.

I'm not the best with it yet but I'm still learning how to use it.

I used an app called Nocrop for the framing, to allow adjustments to the image. I have a lot more to learn about Sketchbook.  Making art on a Tablet isn't easy.

Wednesday, August 5, 2015

How this was done - "You Cannot be Serious" Corel Painter 11

You Cannot be Serious


"You Cannot be Serious," is the image I created today. Using a portrait photograph from the Morguefile Free Photos I downloaded this afternoon, I Digitally Painted this piece.

My approach was fairly simple. I first opened it in Picasa (the update) and I heavily applied the HDRish tool to the portrait. I increased the Value and Radius, both. This highlighted the lines and pores of the face, as well as the shadows and highs.

I saved that iteration and opened in Corel Painter 11. There I used all Digital Watercolor Brushes, a Wash Brush and a Dry Bristle Brush to paint this very Serious Man's Portrait.  I Appended the Flesh Tone Palette and the Earth Tone Palette to the basic color starter one. I selected lighter values to begin with and built up the shadows and lines gradually with darker Flesh Tones.

I painted the small parts of his shirt a purple I had selected for some punch. I decided that I would mirror that color in the face around the shadowed areas. It tied the image in together nicely. I saved that iteration.

Next in Corel PSP Pro X3 I upped the Saturation Vibrancy by 33 and then added as another layer my signature with the property Lighten. I merged the layers. It was already a small display size download, so no adjustment was needed there.


Saturday, March 28, 2015

"Digital Watercolor Homeless Man Four" Corel Painter

Homeless Man Four


I garnered another Homeless Man Portrait from Morguefile and did a Digital Watercolor of it. I opened it in Corel Painter Photo Essentials 4 and applied the Watercolor Sketch tool to it. This auto painted the grayscale image into a sketch to paint with color.

I saved the painting and opened it with Corel Painter 11. There I applied the Flesh tones I wanted to the face. I selected from a colorful palette of flesh tones appended. I added the white in the eyes and beard using a Gouache brush, and painted the knit hat with a version of it as well.

I saved the large iteration and reopened in Corel PSP Pro X3. Here I adjusted it with the Smart Photo Fix, which brightened it up a bit. I made the colors bolder by Increasing the Saturation Vibrancy. I added my signature. Saved again, then resized for display.

My efforts in digital painting are much like using Corel Painter and PhotoShop to arrive at a satisfying image. Although I don't have the most current versions of some of my programs, they still work well in Windows 7 as 32 bit programs. I happily paint away and adjust at will with my current arsenal of Corel Products, I would recommend Corel Painter 2015 as it is a good step up from Painter 11.

I have been a Painter user since its Fractal Design days and highly recommend it to those Photographers who want to learn how to digitally paint their art. A Wacom Tablet is highly recommended as well. They have pressure sensitivity and act like real world brushes. A tablet with a stylus is really needed to paint digitally.

Tuesday, March 4, 2014

"Woman Portrait with Earrings and Necklace" Corel

Woman Portrait with Earrings and Necklace


Today's image is another Colored Pencils Freehand Drawing treated Digitally. I scanned in the Woman's Portrait and also the Jewelry Sketches last night with my Canon MP495.

I opened them in Corel PhotoPaint and cut out the Jewelry pieces (also designed by myself) and copied and pasted them onto the Portrait. I used the Tone Curve to deepen the colors of the Colored Pencils. I also resized the Jewelry pieces and rotated them to fit as Earrings and Necklace. I saved the large 300dpi image to disk.

I opened in Corel Painter 11 and added a watercolor background in Yellow and Green. It brightened up the entire image. I had selected the green from the eyes. I then selected a Blender Brush and blended some of the Hair and the Face and Shoulders. I merged the layers with Drop All and saved the large iteration.

Back in PhotoPaint I added my signature and saved the large image again. The finished image still had some paper texture from the scan.

I opened this file in Corel PSP Pro X3 and boosted the colors with Saturation Vibrancy. I saved the large iteration with a new name and then resized for display.

My background in Jewelry design goes back to High School pre-1969. I designed a number of pieces and cast one with silver, a ring. I did these designs in today's image circa 2005.

Friday, February 28, 2014

"Freehand Woman Portrait with Jewelry" Corel

Freehand Woman Portrait with Jewelry


I scanned a Traditionally done Freehand Fictional Woman's Portrait with my Canon MP495. This was a Colored Pencil and Pastel piece I did a while ago. I had also done some Jewelry Drawings in Pen and Ink. I scanned in these as well. I was open in Corel PhotoPaint.

Here was where I added the digitally cut out Jewelry pieces, Earrings, Necklace, and Decorative Hair Bauble to the Portrait. I had used the Tone Curve on the Portrait to add color depth. I also used the Tune Blur Soften a couple of times to smooth out the blending of colored pencils and pastels.

I added my signature to the large iteration and merged the image layers together, saved it. I then resampled the image for display saving that iteration..

I purposely used contrasting colors, as it was not my intent to match all the Jewelry with the Portrait. I wanted the Jewelry to stand out with the bright colors I had used when designing them on paper. This made for a very colorful image to share with you.

Tuesday, January 14, 2014

"Steampunk Art Deco Collage" Dover - Corel

Steampunk Art Deco 1

Something different for my post today. I decided to scan in an Art Deco plate from Art Deco Designs / Edouard Benedictus. I used my Canon MP495 to scan in the Art Deco plate. I selected from my Dover Publications Samplers two persons in Steampunk Underwear. I opened the scan in Corel PhotoPaint.

There I assembled the Collage. I copied and pasted the gal and guy and erased the background before merging them. I added Birds to the upper right corner also from Dover. I also searched for other unexpected pieces and found an old Building and Trees Landscape Pencil sketch in my Picasa 3.9 folders.

I copied and pasted that from Picasa and resized it to fit the entire image. I applied the property Multiply and altered the Opacity and added it to the collage. I added my signature to the piece and saved the large iteration. I resampled to a size for display here.

Art Deco - Steampunk - Dover - and a Freehand Pencil Sketch in Sepia tone, all combined in an unusual Digital Collage.

Sunday, December 15, 2013

"Black Haired Beauty Woman Portrait" Canon, Corel Painter

Black Haired Beauty


I had time today for digital painting of the last of the three women Pencil, Freehand Drawings. I opened my Canon MP495 scan of the last one in Corel Painter 11. I wanted to keep the image cleaner and simpler. I selected various Liquid Ink Brushes to outline and paint this image. I used the Fine Point, and Camel Ink brushes. I varied the sizes as appropriate. I outlined the Woman in Yellow to brighten the painting, after giving her Raven Black Hair. I chose two Blue hues for her dress.

After I saved the large iteration I opened with Corel PhotoPaint and added my signature. Then I saved and reopened in Corel PSP Pro X3 to add a Border and a Ice Matte. It was here I added a Title, Artist, and Copyright information with Image Information. I saved the large image. Then I resized and saved for display here.

I was contacted by an old friend, Jerry Sprague, who's band is going to perform at the Ann Arbor, Michigan "The Ark". The concert will be January 21, 2014  http://theark.org/3772.html.

They are also having a Kickstarter campaign to fund their new CD:
http://www.kickstarter.com/projects/61826127/live-performance-recording-at-the-ark-ann-arbor-mi.

For more Information and Photos and Videos of Jerry go to his site:  http://www.jerrysprague.com/#!contact/c21nl, you will be glad you did. +Jerry Sprague


Wednesday, December 11, 2013

"Pucker 2 Woman Portrait" Canon, Corel Painter

Pucker 2 Circa 1996


I wanted to continue to digitally paint the three female portraits I posted and not do just one. So here is the second in the series, "Pucker 2."

Scanned in with my Canon MP495, this freehand drawing was opened in Corel Painter 11 and I selected colorful Watercolor Brushes, and the Liquid Ink Fine Point Brush for painting it. I saved the large iteration, since it had a name and my initials on it along with the creation date for the drawing I did not add my signature.

I opened with Corel PSP Pro X3 and used the Skin Softening tool on it. Then I used Saturation Vibrancy for additional punch to the colors. I added a Title, Current Copyright, and Media used to the Image Information and saved again.

I then resized for display and posted it here. I will try to find some time to paint the third freehand drawing of the other woman at a later date. Come often and search my blog of 1,170 posts for additional Digital Visual Artworks! You may enjoy them.

I am in negotiation with a photographer to take some photographs of my Seagull C12 Guitar for additional Guitar based artworks in the near future. For those of you who enjoy those more will be coming!


Friday, December 6, 2013

"125,000 Plus Pageviews - Woman With Blue Beret" Canon - Corel Painter

Woman With Blue Beret

Today gatzkART! has reached over 125,000 Pageviews, a great Milestone to hit. Thank You! 

My last post I asked for votes on which of three Pencil Freehand Drawings of Women you'd like to see painted. The votes received were for the image I am presenting today. "Woman With Blue Beret," was digitally painted in Corel Painter 11 using my Wacom Tablet. I selected Watercolor Brushes and did use Liquid Ink Fine Point for some outlining of the pencil.

I added my signature to the larger iteration in Corel PhotoPaint, then I opened that iteration in Corel PSP Pro X3. There I added a fifteen pixel black border to the image. Re-sizing it to display size, adding Image Information to it, Title Artist, Copyright, etc. I saved it large and resized with differing names.

I hope you like the Digital Painting I did with this Freehand Drawing in Pencil. Comments and Sharing on Google+ is appreciated as are Pluses!


Monday, December 2, 2013

"Select A Gal To Digitally Paint - Help Me Decide" Corel - Canon

One - Beret Woman

Two - Medium Cut Hair Woman

Three - Pucker 2


I have a favor to ask of you. I would like to use Corel Painter 11 on ONE of these freehand sketches and digitally paint her. So I am asking YOU TO VOTE on which gal you would like to see Digitally Painted for a subsequent post here on gatzkART!


I used my Canon MP495 to scan them in and Corel PSP Pro X3 for some Curve adjustments. I also resized the images for display here, always take a click on them to get the larger view of details. I have the larger images to use in Painter 11, and with a newer Driver for my Wacom Tablet I am ready to paint.

So I am asking for your VOTES as to which one you would like to see in full color. You can leave a comment to vote. And Share the post if you are so inclined.

Thank you for your participation and interest in my creative endeavors! 


VOTE FOR 1; 2; OR 3! 

NOTE: If I get enough votes and know who you are you may win an 8.5 x 11 color print of the One selected after I paint it! VOTE NOW!

Friday, November 29, 2013

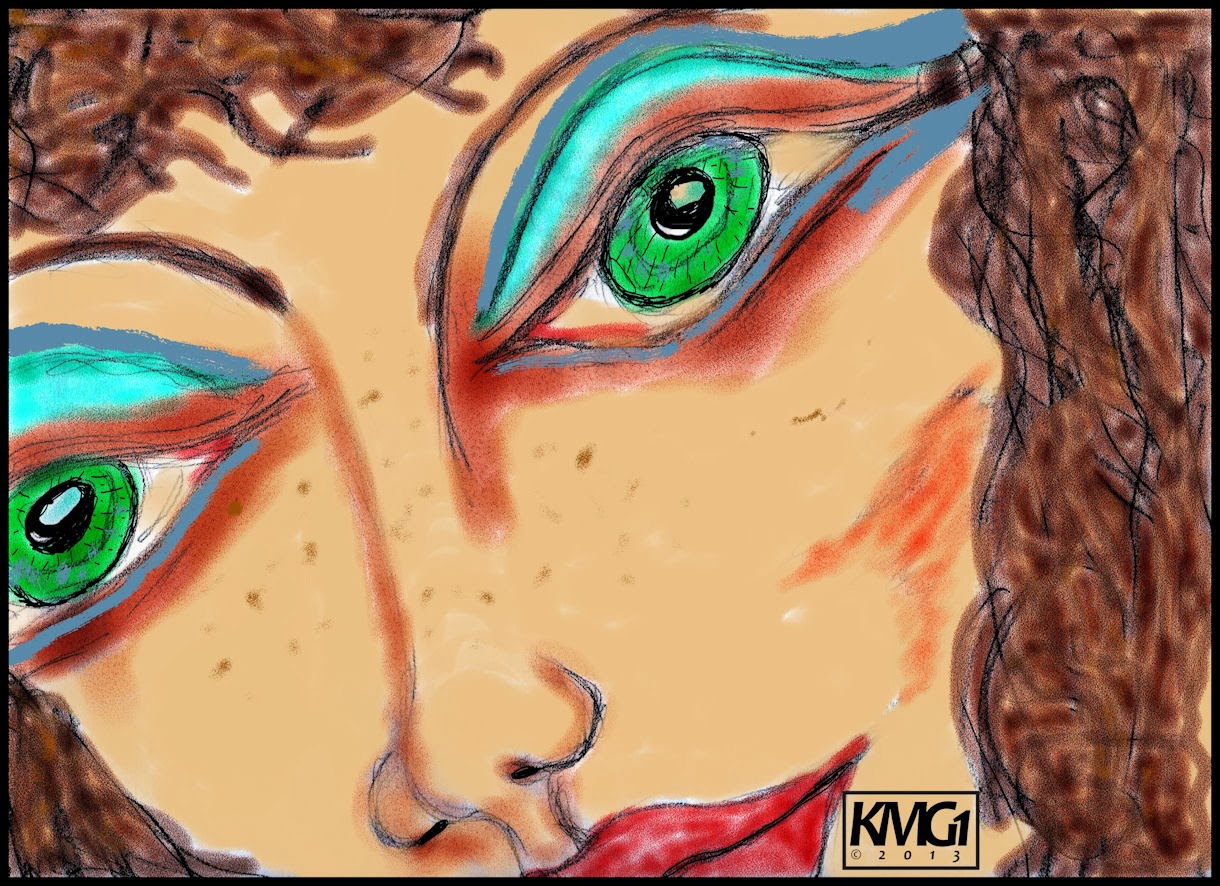
"Eye, Nose, Lips 1A," Canon - Corel

Eyes, Nose, Lips 1A


Throughout my Archives I keep finding images, many pencil sketches, of interest to me. I found four today and selected the image you see. "Eye, Nose, Lips 1A," is a pencil sketch of unknown date. I scanned in the pencil sketch with my Canon MP495 with a small amount of cropping. I like the way the face fills the screen, viewed in large mode.

I took this scan and opened it in Corel Painter 11. There I used Watercolor Brushes, Tinting Brushes and Liquid Ink Brushes on it. I painted it for bold color but fairly realistic coloring. I used Painter's Mixer to blend up a flesh tone for the Tinting process for the face. I applied the Liquid Ink as Eye shade color and freckles, using the palette I created with the flesh tone. I saved that iteration at 300dpi.

I opened CorelDRAW to create an Initials copyright symbol. I used Candara Font and drew the characters closer together. I added the copyright symbol and date expanding the characters to fit. Then using a bold line I drew a box around the Initials and copyright. Grouping that I saved it as a native CDR file. Copied and pasted it into the image.

I saved the file again. I opened with Corel PSP Pro X3 and added a 25 pixel black border. Using the Image Information I added a Title, Copyright Information, and Equipment and programs used to create this image. Saving that at the large size I resized to display here and saved that file.

So here I am sharing another older image with a new twist to it, the Corel Painter 11 twist. I used my Wacom Tablet which is ancient and acts like a mouse (i.e. no full screen coverage,) but it still paints better than a mouse.

There is no driver for my Wacom Graphire tablet for Windows 7 32-bit, so I use it carefully as I paint, moving my hand position to the part of the screen I need to be at. It is tedious but worth the time it takes and it paints nothing like a cumbersome Mouse.

NOTE: I researched for a compatible Wacom Driver and selected an older Driver that was compatible with Win XP; I downloaded that and it installed with that compatibility set. Now My Wacom Tablet is working as it should covering the entire screen and is very sensitive to use, more than previously. Kudos to Wacom for this Driver! 

Tuesday, November 26, 2013

"Freehand Drawing Vintage 1980, Acrylic coated Pastel Man" Corel - Canon

Old Man Sleeping India

Pencil and Pastels Man Acrylic Coating


Digging through my past works that my son found stored away I have these to share today.

"The Old Man Sleeping India," was a freehand drawing made from a photograph that my Dad took while stationed in India during the Korean War. It is a circa 1980 Color Pastels Pencils Drawing.

The second image is a fictional "Man's Portrait," done freehand in Pastels, this was drawn on old packing paper, with the brown of the paper showing through. I took a few photographs of it and this was the clearest, I used the flash so you can see the Acrylic Coating Media I used to preserve it.

With both photographs, taken with my Canon Rebel XTi, I adjusted in Corel PSP Pro X3. Cropping, some color enhancements with Saturation, and a framing with boarder on the second image.


Saturday, November 23, 2013

"Freehand Drawing Retro Pencil Sketches" Corel - Canon

Blunt Cut Hair Woman Pencil

Large Eyes Man Pencil

MAC - Amiga - IBM Computers on Iceberg

Not much to explain in the way of workflow on these Retro Pencil Sketches. I scanned two of them in with my Canon MP495 and captured the third with my Canon Rebel XTi camera.

Some adjustments made in KPT Collection, Corel PhotoPaint, Corel PSP Pro X3; in regard to sharpness and clarity and size for posting. As you can see the Pencil Sketches are from 1998 and I don't recall the original date of the Computers Sketch.

I wondered about where my thought process was when I added the Three Competing Computers on an Iceberg! Go Figure! Computing power has come a long way since this MAC and Amiga and IBM PC!


Friday, November 22, 2013

"Garden Lady Colored Pencils" Corel - Canon

Garden Lady Colored Pencils

My son was rearranging a closet for us and found a case with some of my older Freehand Drawings and Paintings. "Garden Lady," is one of those. I got out my Canon Rebel XTi and took some photographs of the artworks. This one is the first one I worked on for display here.

I copied my Medium sized photographs to the Hard Drive and viewed them, deleting a few that were very poor quality (operator error.) I opened "Garden Lady," in Corel PSP Pro X3. I did some cropping, and used Saturation Vibrancy and Color Curves on the photograph. I imported my signature PNG file, which unfortunately it had some pixelization to it.

I added a Polaroid frame and a border to the image. I saved the iteration with Image Information including Copyright, Title, Artist. I then resized for sharing here.

I have a few other images to share in subsequent posts.