Pages

Monday, February 28, 2011

Guitars - Digital Watercolors - Painter 11 - PhotoPaint


I recently had the privilege of having one of my songs arranged and played and sung by another musician. The song is "Open Secret," and I had just put it on my Acoustic Guitar Community - My Page listed below. ( I have since then added some older songs from 2004 to my listing so the song is listed as #4 on my playlist, my version.)

His name is Kenneth Brodie and he hails from Australia. He requested my permission to play it for his gigs and I asked him for a recording of what he came up with. He did a marvelous job with the song, keeping it simple and delightful, his recording is very good.

My wife said that she really liked his arrangement as well, he did stick very close to my version but simplified it and played a quiet instrumental version with his vocals. Needless to say I am happy that another musician found my song to be one he was attracted to and wanted to add to his repertoire.

Currently my songs and my recordings are not for sale, so you can only listen to them at My Page on Acoustic Guitar Community or some that are on SoundCloud. I have badges for both on the right hand column of this blog down the pages.

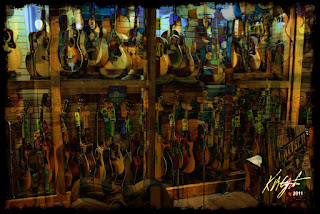
Today's image falls right in line with the topic above. It is a photograph of Guitars that I painted in Painter 11. I first used the quick clone with a light ocher background, selecting Real bristle brushes I did some of the background.

For more muck up I selected Skip's Digital Watercolors and creating a small brush I did an auto clone. I then varied the digital watercolor brushes and painted the guitars in roughly. Using the cloner soft clone I added back in some details, like the strings and soundholes and bridges.

I then Applied Surface texture twice first using Image Luminance and then selecting the French watercolor swatch I added more Paper detail, adjusted slightly so as not to overwhelm the painting.

I saved the large file and opened it in PhotoPaint to resample it for display and I added a Filter Forge film frame to the piece.

----------------
Now playing: Ken Brodie perform written by Kirk Matthew Gatzka - Open Secret
via FoxyTunes

Saturday, February 26, 2011

Dreamy Focus - Tritone - PhotoPaint


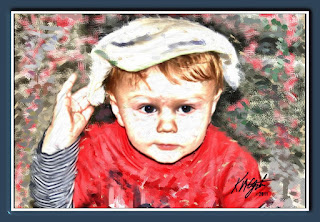
I cropped today's image from a color photograph of my Grandson while in PhotoPaint. I had downloaded Filter Forge's Freepack 2 Photo Effects to test them out.

First I created an 8-bit Tritone of his photograph and then converted it back to RGB 24-bit in PhotoPaint. I used Filter Forge's Dreamy soft focus filter on the Tritone image and put the focus on his eyes, nose and mouth. I tried a couple of variants in Filter Forge before I was satisfied with the piece.

I then applied Filter Forge's Film Frame to the resulting image for a dark frame. I like the focus of the Tritone as it gives us a soft focus and clear view of his smile, and the vignetting of the darkness surrounding him leads the eye to his face.

----------------
Now playing: Bob Dylan - Series Of Dreams
via FoxyTunes

Friday, February 25, 2011

Thinking Spring - Experimental Irises - Painter 11 - PhotoPaint


Here is an experimental image done in Painter 11. I first used an Art Deco background and resampled it to a larger 128dpi size in PhotoPaint. One of my Dover Publications clip art pieces. I then saved that and opened it in Painter 11.

I used the Amazonia brushes for cloning on a quick clone with an ocher background, using Auto clone. I added the Great Crested brush for some looseness. Also I added a texture called "florella" from Flaming Pear.

I opened another image and set it to the clone source. Using the Inkspiration brushes I added the cloned Irises to the background I had created with the Twisted Direction brush.

I was thinking Spring! These Irises came from our own garden photographs.

I finished in PhotoPaint adding two borders one black the other plum. I used the wand on the plum and applied the Effects> Texture> Plastic> for a 3D look.

----------------
Now playing: Kirk Mathew Gatzka - Time
via FoxyTunes

Thursday, February 24, 2011

Digital Collage - Dover Clip Art - PhotoPaint


----------------
Now playing: Kenny Wayne Sheppard - Every Time It Rains
via FoxyTunes

Wednesday, February 23, 2011

Guitar Dreams - PhotoPaint


Short post today, a simple digital manipulation in PhotoPaint. I selected two guitar photographs and superimposed them upon each other. I adjusted the opacity and used an object property for transparency.

I resampled the image for the web, resizing it to 1200 pixels wide 72dpi and compressed it, saving that file. I decided it needed a Grunge type frame so I opened Filter Forge's Freepack 3 Frames and applied the grunge type frame, clicking through variants randomly until I found one I liked. I applied that to the image.

A simple approach for a complex appearing image.

----------------
Now playing: Kirk Mathew Gatzka - Open Secret
via FoxyTunes

Tuesday, February 22, 2011

This is Not a Hat! - Painter 11 - PhotoPaint


My Grandson with a makeshift hat on is the image for today. I browsed in Picasa 3 and selected this photograph as I love his expression and the washcloth on his head. It did not take long and he removed it.

I opened the photograph in PhotoPaint, cropped it and copied to the clipboard. Then I used the Image> Adjust> Local Equalization> on the image. I pasted the copy from the clipboard and before merging the two I used the object property Add, with an opacity setting of 86%.

Saving that file I opened it in Painter 11 and did a quick clone, with a ocher background color. I wanted to play with the image so I selected the Amazonia> Artistic Monkey> brush and did a roughing in. I also used the Great Crested brush for the muck up.

Switching to the Camel Oils brushes I used the iHigh Bleed 12 brush to begin adding back in details with the clone button selected. I also used the High Bleed brush for details. To make the hand look more realistic I selected the clone brushes soft clone and used that on the hand, mouth, nose and hair.

I then selected the reddish color from the shirt to add to the background with the Great Crested brush, which I also used to add some of the blue gray from the stripes.

Back in PhotoPaint I added a 70 pixel black border then a photograph frame with Filter Forge. I used the wand selector and selected the blue frame and applied the Texture> Plastic> filter to it for some 3D effects.

Monday, February 21, 2011

Cordovan Rockport Dress Shoes - Close up - Painter 11 - PhotoPaint


A close up of my Cordovan Rockport Dress shoes is the subject for today's image. I took a number of still life photographs of shoes and my straw hat, In Picasa 3 I selected this close up as I liked the Double tie of the shoelaces.

I opened the large file in Painter 11 and did a quick clone with an ocher background color, selected Live Impasto> Bristle 2 and adjusted the opacity to 40%. Varying the width of the brush I painted the shoes keeping to a rough stroke. I wanted the basic flow of the dress shoes and the double knot of them tied together.

I used the soft clone brush to add a little detail to the shoelaces for more interest. I opened the file in PhotoPaint to resample for the web and added a 20 pixel black border as a frame.

I also adjusted the Tone Curve for depth and upped the saturation by 7 to boost the colors.

----------------
Now playing: Blind Blake - West Coast Blues
via FoxyTunes

Sunday, February 20, 2011

Classic Acoustic Guitars - Paint.NET - PhotoPaint


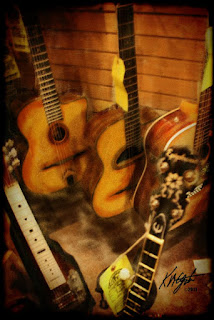
A short post today. Here is an image from a photograph of some classic acoustic guitars.

In Paint.NET I used the Kuwahara Modified filter for a painterly look. Then used the Ink sketch filter for line art. I adjusted the Curves> Luminosity> for depth of color.

I took the file into Painter and applied the Lighting filter which gave it a bit of vignetting.

In PhotoPaint I added the frame with Filter Forge's Freepack Frames.

----------------
Now playing: Beatles - While My Guitar Gently Weeps
via FoxyTunes

Saturday, February 19, 2011

Guitar Collage - Kaleidoscope - Paint.NET - Painter 8 - PhotoPaint


I was experimenting with collage on one of the guitar photographs I had taken recently. I opened the resized photograph in Paint.NET and applied the Ink Sketch filter. I also adjusted the Curves> Luminosity>. Saving that file I opened in Painter 8.

There I used Flaming Pears Chromasolarize filter. I saved the file and reopened in PhotoPaint and opened a second guitar image and cut and pasted pieces of guitar and placed them somewhat haphazardly into the piece. Saving that I opened it in Paint.NET again.

I used the Kaleidoscope filter and played with the settings until I had an image that was satisfying to me, Here you can see both before and after images. My favorite is the Kaleidoscope piece.


----------------
Now playing: Beatles - All You Need is Love
via FoxyTunes

Friday, February 18, 2011

Guitars - Chromasolarized - Paint.NET - Painter - PhotoPaint


At a recent visit to Motor City Guitar in Waterford, Michigan I was allowed to take some photographs of the surrounds. I haven't discussed much music on the blog recently so I decided to add this guitar image from that visit.

I had opened the photograph in IrfanView to do a batch conversion of some of the photographs down to 1024 size. I find that program very useful for batch conversion and use it for resizing for the web quite often when I want to do more than one image.

I selected this photograph and opened it in Paint.NET and adjusted the Curves Luminosity lightening the piece. Then I applied the Effects> Artistic> Ink Sketch> with the color turned all the way up, but the ink turned down. Saving that file I opened in Painter 8 for a set of plugins that I haven't added to Painter 11.

I applied the Effects> Flaming Pear> ChromaSolarize> to the image for a unique look. It warmed up the piece and gives it some added punch.

DADGAD Guitar Playing - Beautiful and soothing!


----------------
Now playing: Moby - Guitar, Flute And String
via FoxyTunes

Wednesday, February 16, 2011

Another Straw Hat and Dress Shoes - Paint.NET - Painter 11 - Watercolors


I had taken so many photographs of the Hat and Dress Shoes that I decided to do another image based on this photograph. I prepped the photograph in Paint.NET as you can see by the first image. I used the Pencil Sketch filter and upped the pencil size and range this gave me a grayscale image in RGB. I took it one step further and applied the Ink sketch filter for additional detail and line.

I took that image into Painter 11 and selected the Splashing Watercolor brush Smooth Wash, which acted almost like a tinting brush. I applied the differing colors from the basic color palette, leaving a subtle watercolor look and feel.


----------------
Now playing: Paul Simon - Diamonds On The Soles Of Her Shoes
via FoxyTunes

Tuesday, February 15, 2011

Straw Hat Dress Shoes - Paint.NET - PhotoPaint - Painter 11


At the bookstore I was browsing Painter books and other Digital Photography books. I found a really nice image of a shoe, very painterly and with much depth. I was inspired to Photograph my old Straw hat and some dress shoes.

I used various techniques on them, but certain steps I took with each one of them. In Paint.NET I used the Ink Sketch filter and the Kuwahara Modified filter on most of these photographs.

In PhotoPaint I added frames using Filter Forge. I wanted a look and feel of depth and a certain amount of detail in each image. I took more photographs but I have yet to browse those more closely to continue this motif.

----------------
Now playing: Edward Sparks - SweetwaterandWhitebreadtestmix2142011
via FoxyTunes

Monday, February 14, 2011

Alaskan Mountains Shrouded in Clouds - Painter 11


I took a couple of days off, so I hope that you still followed gatzkART! I was browsing through my Alaskan trip photographs and found many nice photographs to select from. This particular photograph was a very cloudy day and the mountains in the background were almost obscured by the cloud cover.

I opened with Painter 11 and did a quick clone with a slight yellow ocher background. I selected the Watercolor brushes and began to paint. I used varying sizes and opacity for each area of the painting. I added some detail back in with the Soft cloner.

I adjusted the Brightness of the piece and made sure the background mountains were faint. I added a little more color with the Digital Watercolor brushes. I saved the file and opened with PhotoPaint.

Here I added a watercolor frame from Filter Forge and adjusted the Tone Curve to lighten up the image, I saved the image and reopened in Painter 11 to add some texture, I selected the Apply Surface Texture> Image Luminance> to the entire piece.

I am adapting to using the watercolors, but still have a difficult time with the darkness of the brushes. Needless to say I am still learning Painter 11 and it's features.

What do you think? Does this watercolor image have too much dark color? Or are the background mountains too light? Your comments are welcome.

----------------
Now playing: Blues Traveler - The Mountains Win Again
via FoxyTunes

Friday, February 11, 2011

Thursday, February 10, 2011

Hey, I'm Walking Here! - PhotoPaint - Paint.NET


Short Post today. Here is my Grandson, walking with the aid of the furniture. I opened this photograph in PhotoPaint and applied the Tone Curve to lighten it a bit.

After saving it I opened in Paint.NET and used Kuwahara Modified filter on it for a painterly look. Then I used the Effects> Artistic> Ink Sketch> filter on it adjusting the color a bit and lessening the Ink to allow the painterly features to show through.

In PhotoPaint I added a Film frame using Filter Forge. A simple crop and a simple approach to this image. "Hey, I'm Walking Here!"


----------------
Now playing: Fats Domino - I'm walkin'
via FoxyTunes

Wednesday, February 9, 2011

What Did You Feed Me? - Painter 11 - Pencils - Watercolors


Here is another of the 50+ photographs I took of my Grandson recently. As you can see by his expression he did not like the taste of the pasta that he was just fed. Hence the title "What Did You Feed Me?"

I opened the photograph in Painter 11 and applied an equalization to it to lighten it up. I quick cloned the large file and began with the Pencil cloner on the hair. I varied the size of the Pencil and did more of the face and shirt, hands, and shading.

I also used the Watercolor brushes and the Filbert brush on the piece. I added some more to the image with the Digital Watercolor brushes. The heavy shadows come from my non-filtered flash of the Canon Rebel fixed flash. I need to buy a filter for it to soften the harsh shadows it makes. But that is another story.

I saved the file and opened it in PhotoPaint where I adjusted the Tone Curve to lighten up the tones. I did no saturation adjustments at this time as I like the way the tones turned out. I applied the resample to adjust the image size for sharing here.

----------------
Now playing: Kirk Mathew Gatzka - Smooth Ride-DADGAD-4th fret
via FoxyTunes

Monday, February 7, 2011

Grandson - Portrait - Painter 11 - PhotoPaint


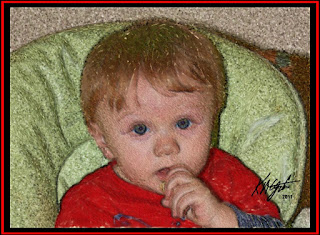
Recently I sat with my Grandson and took about 50+ photographs, couldn't help myself. Here is one where he is enjoying a bit of banana. I prepped the photograph in PhotoPaint by first cropping then using the copy to clipboard. I pasted as new image from the clipboard.

I proceeded to apply the Effects> Art Strokes> Charcoal>. I then added back, by pasting, the color photograph and used an object property for transparency. I merged the two. I saved this file and opened it in Painter 11.

There I did a quick clone with a light ocher background and selected the chalk cloner brush. I painted all of his face and hand and shirt with this brush. Remember it had a charcoal like appearance from my prep. I selected the Splattery cloner brush and did the background.

I also selected the Van Gogh cloner and painted some of the shading with that brush. I added back in some details with the Soft and Straight cloner brushes.

Back in PhotoPaint I added black and red borders and resampled the image for sharing here.

----------------
Now playing: Aimee Mann - Wise Up
via FoxyTunes

Sunday, February 6, 2011

Fauve Colors Floral - CorelDRAW - CorelTRACE - Painter 11


For this experimental image I selected, while browsing in Picasa 3, one of my Dover Publications floral clip art. I opened with PhotoPaint, then I copied to CorelDRAW and selected to Trace the bitmap in CorelTRACE. I used the outline trace and saved the file as a .CMX file and reopened it in CorelDRAW.

There I ungrouped all the outlined pieces and add some outrageous coloring and gradients, leaving some of the basic colors alone. I regrouped these pieces and copied to the clipboard and pasted into PhotoPaint using File> New from Clipboard>.

As I copied it I increased the size of the image to work on a larger one. I saved this file and opened it with Painter 11. I did a quick clone and selected the Eastern Water Chrysanthemum Wet brush and painted the entire floral with the clone button on.

I then Applied Surface Texture using the Artist Canvas, lightening it up a bit. I selected an Oil brush and two blue colors for the background, which allowed the texture to show through.

Back in PhotoPaint I selected a Painting Frame in Filter Forge, adjusting the width and number of grooves set to one. I saved that file for sharing here.

----------------
Now playing: Travis - Flowers In The Window
via FoxyTunes

Saturday, February 5, 2011

Beach Scene - Holland, Michigan - Painter 11 - Paint.NET


This project started as a photograph of the beach at Holland State Park in Holland, Michigan. I found it browsing in Picasa 3. I did some prep work on it using Paint.NET applying a filter that simplified the photograph into a painterly appearance.

I then took that saved file and opened with Painter 11, did a quick clone and selected the Oil brush. I was hoping for an impasto look and feel and this is what I got. I also used the Soft cloner and the straight clone to bring back some of the altered detail.

I grabbed the Distortion brush Confusion and diffused the sky. I left the rest of the image alone. Back in PhotoPaint I added a Painting frame in Filter Forge.

----------------
Now playing: Mark Knopfler and Emmylou Harris - Beachcombing
via FoxyTunes

Friday, February 4, 2011

Maxfield Parrish - Digital Collage - PhotoPaint


Again browsing in Picasa 3 I went to my Mayang's Textures folder and selected a flaking blue paint texture for my background. Using two images from Dover Publications, done by Maxfield Parrish I created a simple digital collage in PhotoPaint.

I liked the blues of both Parrish paintings, they went well with the blue texture. I had resized the image to 1200 then added a Navy blue 10 pixel border in PhotoPaint. I added his name to the collage like I did with the Alphonse Mucha collage I had done recently.

Doing a search on the artist I found many reference sites for him [click here] for one about his art and illustrations.

----------------
Now playing: Robert Plant & Alison Krauss - Gone Gone Gone (Done Moved On)
via FoxyTunes

Wednesday, February 2, 2011

Alaskan River - Acrylics - Painter 11 - PhotoPaint


Continuing with Alaskan landscapes I selected this photograph in Picasa 3 of a rocky river. I opened with Painter 11 and selected Acrylics brushes. I did a quick clone again to paint upon. I used various Acrylic brushes for the foliage and the Soft cloner to add back in some leafy detail.

I selected a wet acrylic brush for the water and rocks and painted those. I added some detail with a Crayon brush with the clone button selected. To blend I selected the Distortion brush Confusion. I saved the large file.

I opened with PhotoPaint and adjusted the Tone Curve and the color saturation set at seven. I added a 10 pixel white border and then a larger border in light blue. Using the wand I selected the light blue border and applied the Effects> Texture> Plastic> filter using another light blue color. Finishing it with a 10 pixel black border for larger viewing.

----------------
Now playing: J.J. Cale and Eric Clapton - Ride The River
via FoxyTunes

Tuesday, February 1, 2011

Alaskan Mountains - Watercolor - Painter 11 - PhotoPaint


Here is an image that is done in Watercolor in Painter 11. I browsed our photographs from our Alaskan trip a couple of years ago and found many good mountain based ones. I browsed to this one in Picasa 3, and opened with Painter 11.

I did a quick clone and selected the watercolor brushes. Clicking on the clone button I adjusted the opacity and saturation for each layer of the foreground and subsequent mountain layers. I painted at first with the fine watercolor then the larger brushes. I was using the large photograph so the brushes moved slowly at times, as is the case with watercolor.

I also selected the Gouache brush for the sky, as in the photograph it was mostly white and very light blue. I added some blue with a Whitewater brush to the piece for added depth. I saved the file as a jpg for use in PhotoPaint.

Opening it in PhotoPaint I added Filter Forge's watercolor frame , narrowing it and changing the color to a sky blue. I also squared off the corners more, less rounded. Here I resampled the larger image for display on the internet. I also adjusted with the Tone Curve to lighten up the image.

----------------
Now playing: Alan Parsons Project - Eye In The Sky
via FoxyTunes